
Setting Up Tailscale on Vultr for Bug Bounty Hunting | Part 1


Go to https://vultr.com and sign up for a new account.
💰 Use the code “VULTRMATCH” to have the platform match your deposit up to $100. I deposited like $10 to start out, so they matched it with another $10.
Go to https://tailscale.com and sign up for a new account.
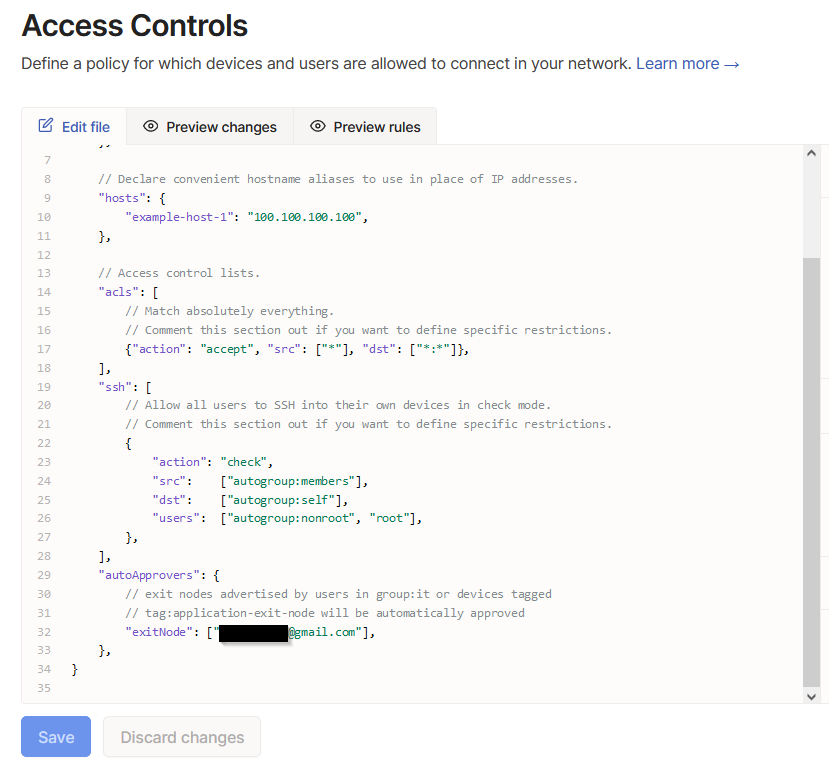
Navigate to the “Access Controls” menu at the top and and insert the following:
"autoApprovers": {
		// exit nodes advertised by users in group:it or devices tagged
		// tag:application-exit-node will be automatically approved
		"exitNode": ["<INSERT EMAIL HERE>"],
	},
Insert your email and it should look something like this:
Now navigate to the “Settings” menu and you will see the option “Keys” under “Personal Settings”. Here you can create an auth key and will have it set as reusable and ephemeral. Make sure to keep this key secret because it bypasses normal authentication methods for Tailscale. This is the Keys page:
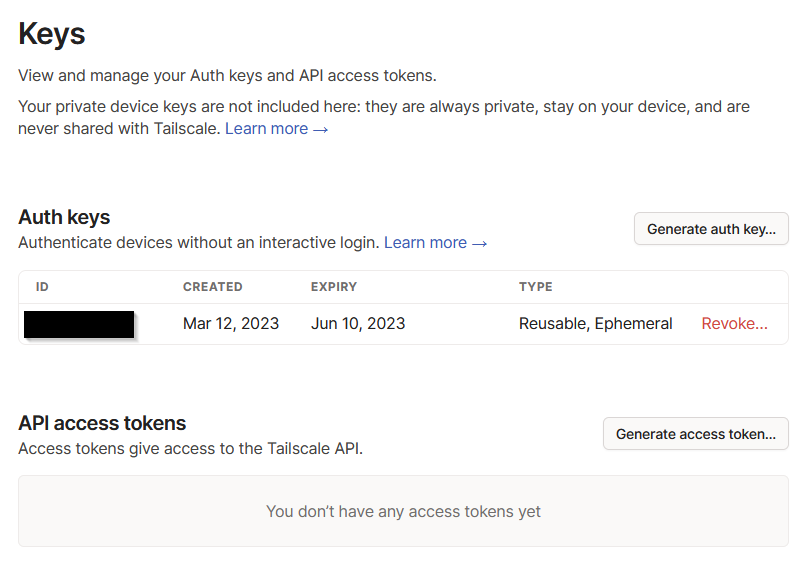
It is being set as reusable so that you don’t have to continually update your future Vultr boot script, and is ephemeral because it represents a temporary machine that will be auto-deleted from your machine list in Tailscale if it hasn’t contacted the server in a certain amount of time. This is necessary because Vultr will continue to charge you if your machine is shutdown. When you are done using your Vultr machine for the day and you don’t want to continue using up your credits, it needs to be destroyed.
Navigate back to Vultr and go to the “Scripts” section of the top menu. There you can add a startup script for Tailscale to be automatically configured upon creation of a new machine. Here is the bash script for that:
#!/bin/sh

curl -fsSL <https://pkgs.tailscale.com/stable/ubuntu/focal.noarmor.gpg> | sudo tee /usr/share/keyrings/tailscale-archive-keyring.gpg >/dev/null
curl -fsSL <https://pkgs.tailscale.com/stable/ubuntu/focal.tailscale-keyring.list> | sudo tee /etc/apt/sources.list.d/tailscale.list

yes | sudo apt-get update
yes | sudo apt-get install tailscale

echo 'net.ipv4.ip_forward = 1' | sudo tee -a /etc/sysctl.d/99-tailscale.conf
echo 'net.ipv6.conf.all.forwarding = 1' | sudo tee -a /etc/sysctl.d/99-tailscale.conf
sudo sysctl -p /etc/sysctl.d/99-tailscale.conf

sudo tailscale up --advertise-exit-node --authkey tskey-auth-<INSERT KEY HERE>
Now, it’s finally time to deploy your Vultr instance. Here are the settings I use to keep it as cheap as possible:
Cloud Compute
Intel Regular Performance
Whatever server is closest to you geographically
Ubuntu 22.04 LTS x64
25 GB SSD w/ 1 vCPU, 1 GB memory, and 1 TB bandwidth for $5/month ($0.007/hour)
Turn OFF auto backups (everything can be backed up and scripted in cheap ways)
Select your Tailscale startup script
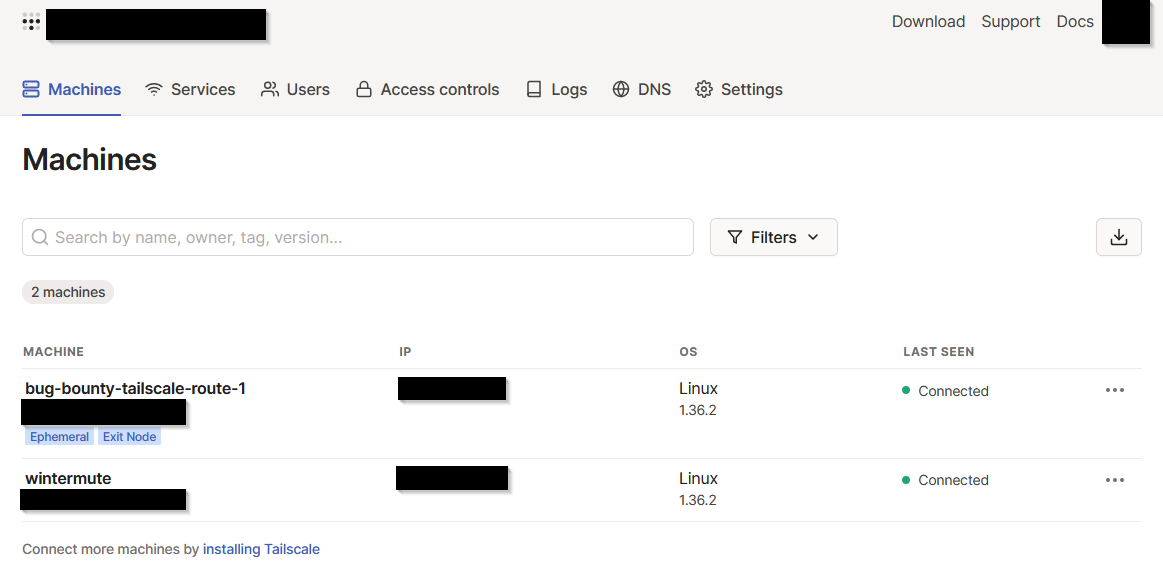
And it should be ready to go! All you have to do now is select a name, deploy the machine, and in a few minutes it should show up on Tailscale:
To use the exit node on your bug bounty machine, install Tailscale on the machine, and then run this command instead of the normal “sudo tailscale up” command, and insert the exit node IP that is shown on your “Machines” page in Tailscale:
sudo tailscale up --exit-node=<EXIT-NODE-IP>
To verify that you are now using a new external IP owned by Vultr, you can go to a site like https://www.showmyip.com/ and it will give you all of that information.
Here are some helpful links if you have questions or got lost along the way:
Tailscale Exit Nodes, Tailscale Auth Keys, Tailscale Auto Approvers for routes and exit nodes, Tailscale installation instructions.